Category Archives: DIY TIPS

The POWER of wallpaper {don’t be afraid}


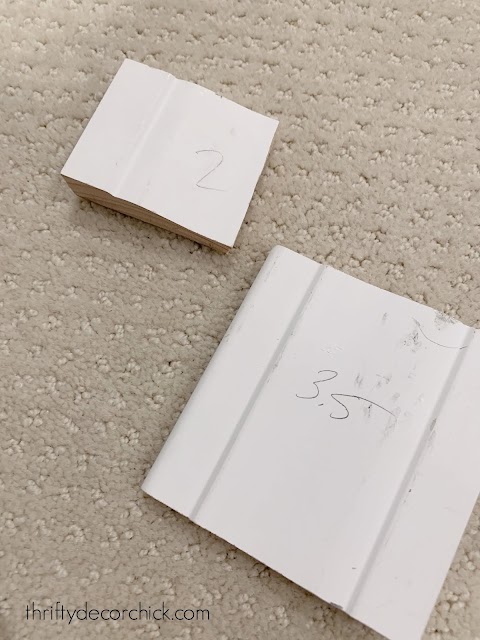
I don’t know what came over me when we moved into this house 3 1/2 years ago, but I’ve added wallpaper to almost every room makeover so far! Wallpaper is back in a big way, but I never really had any desire to use it until we moved here. 
Maybe I’ve fallen in love with wallpaper because I’ve had an empty slate, or maybe it’s because once you add it once you just want to keep going. It’s addictive! 
I’m rounding up all of the ways I’ve used wallpaper so far — from little accents to entire rooms covered in it! If you’ve ever wondered about the different designs I’ve used, this will be a good resource. These examples show the difference it can make in a space!
I’ve used both pasted and peel and stick wallpaper throughout the house. The pasted wallpaper is supposed to be easier to remove if you ever grow tired of it. But I don’t put much faith in that. 😉 If you use the pasted kind (I’ll share how to install it later in the post), I would make sure it’s one you really love! I wouldn’t do anything too trendy that you may tire of a few years later. 
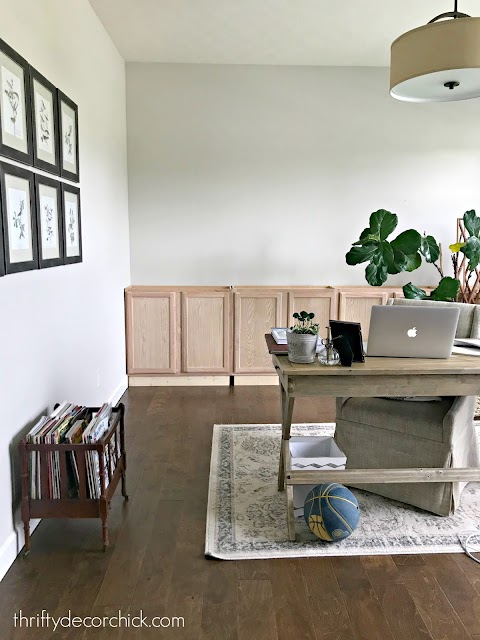
I used peel and stick on the built in bookcase wall in my office. Here’s how it looked before, with the blank wall: 
kitchen cabinet bookcases in office
I used this peel and stick cherry blossom design on the backs of the bookcase shelves:
dark green DIY built ins office
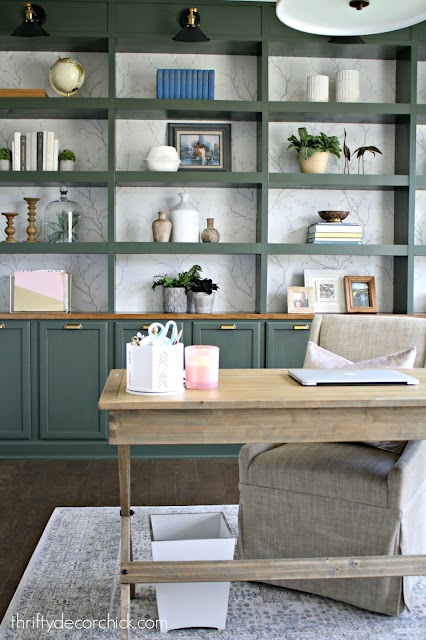
It’s a beautiful, understated accent that gives the room a little extra something. You won’t even spend $50 to add this detail!
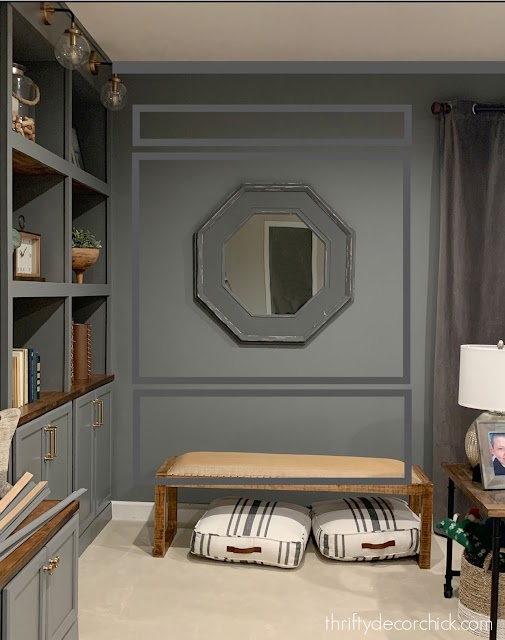
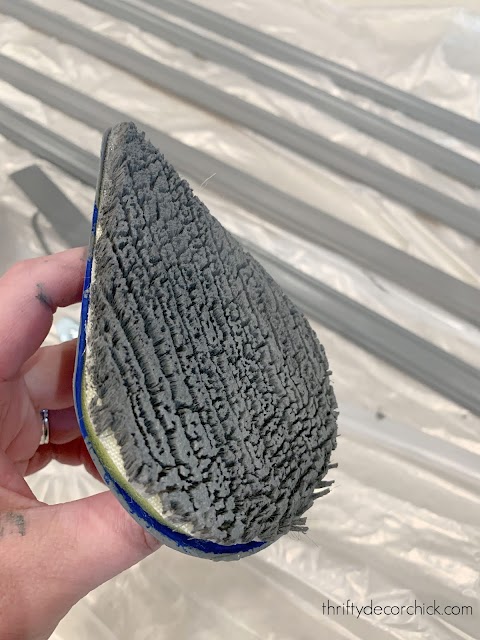
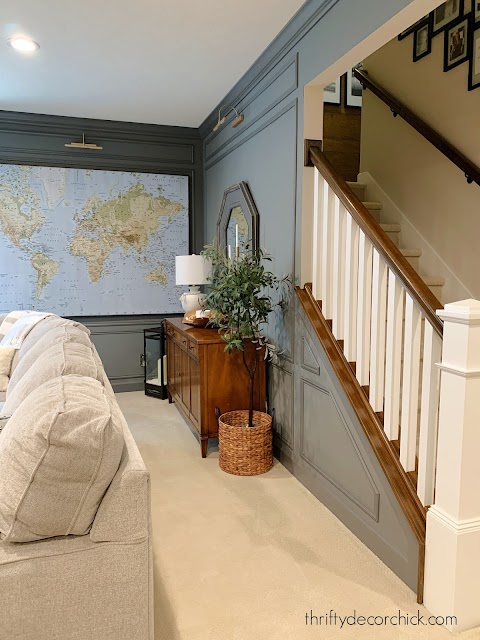
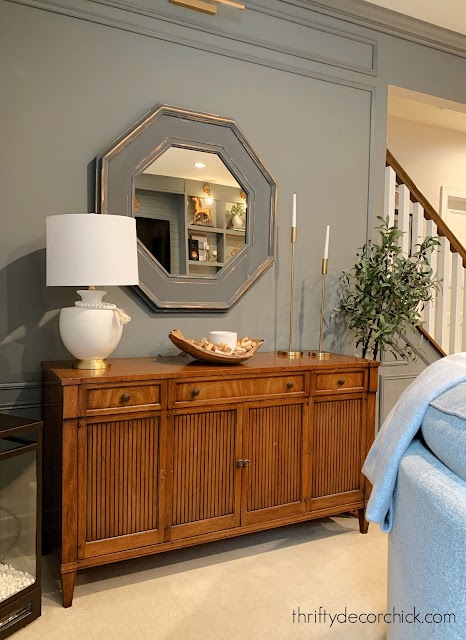
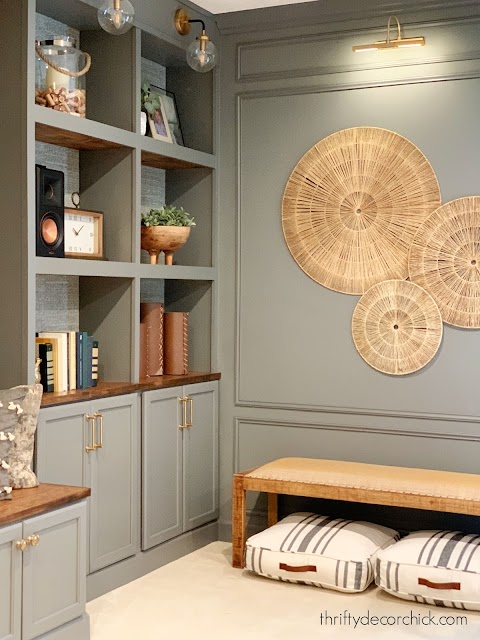
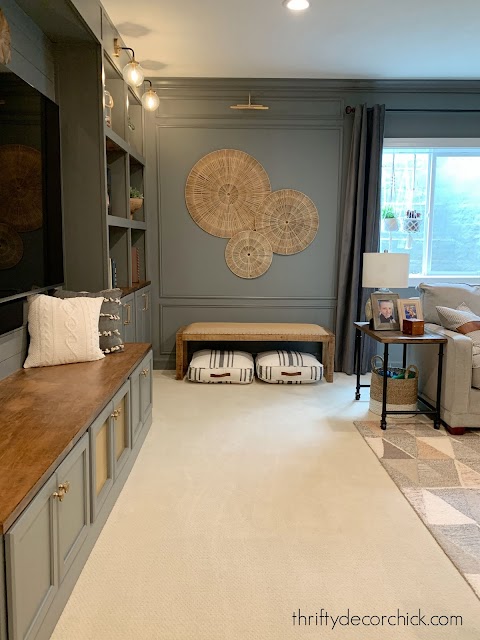
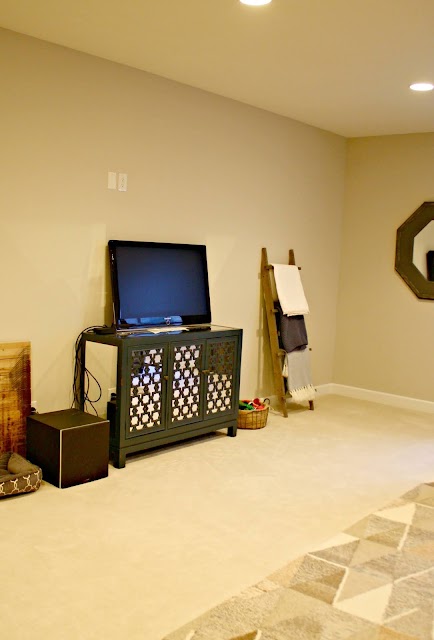
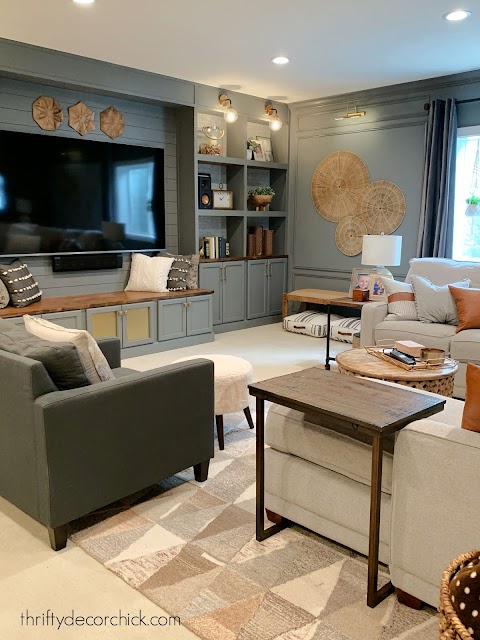
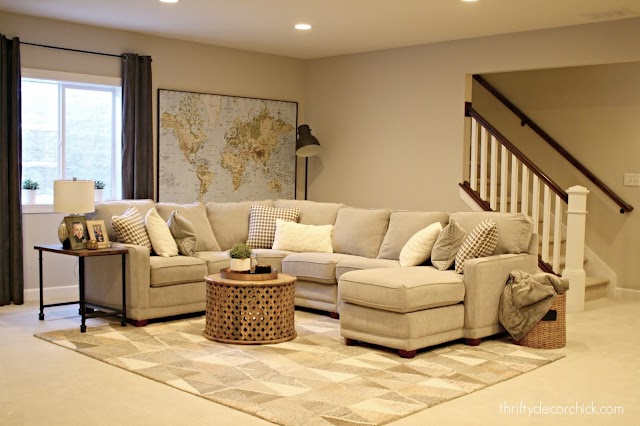
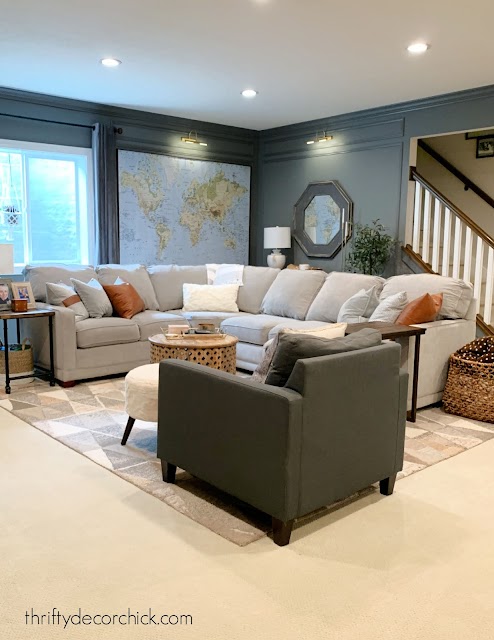
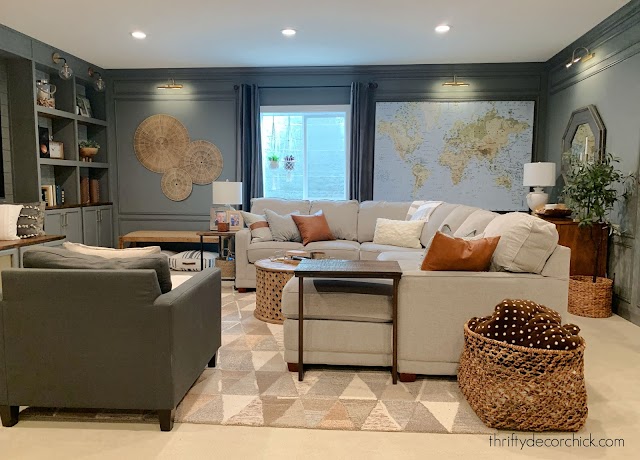
I did the same in the basement with a gray tweed looking peel and stick wallpaper: 

dark gray westchester bookcases with wood

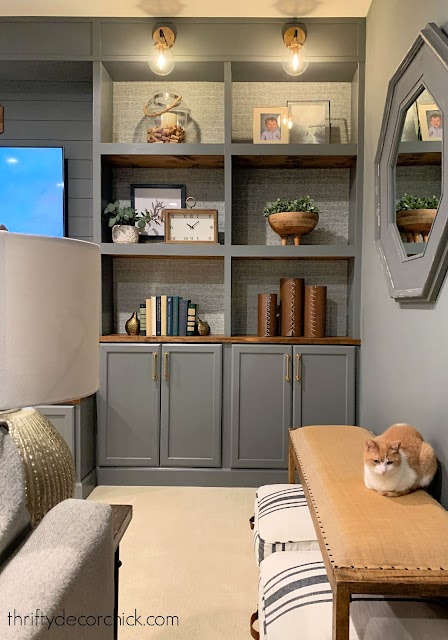
I wasn’t sure about that one when it arrived — but once it was out of the package and I held it up to the wall, I fell in love. 
Wallpaper tip #1: Don’t judge it while it’s rolled up! Take it out and hold it up to the wall. Take a picture of it against the wall, it will help you visualize the space.  
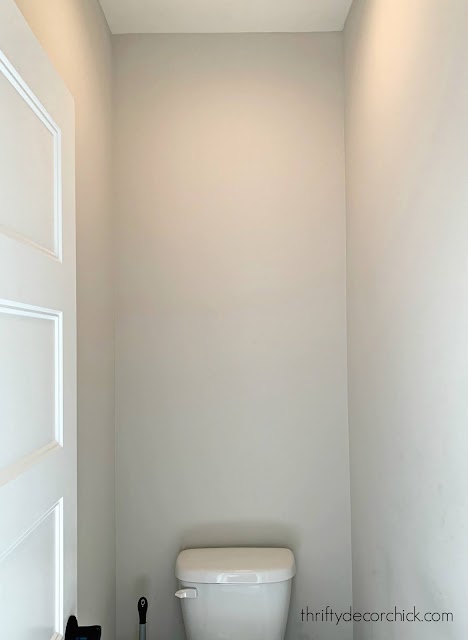
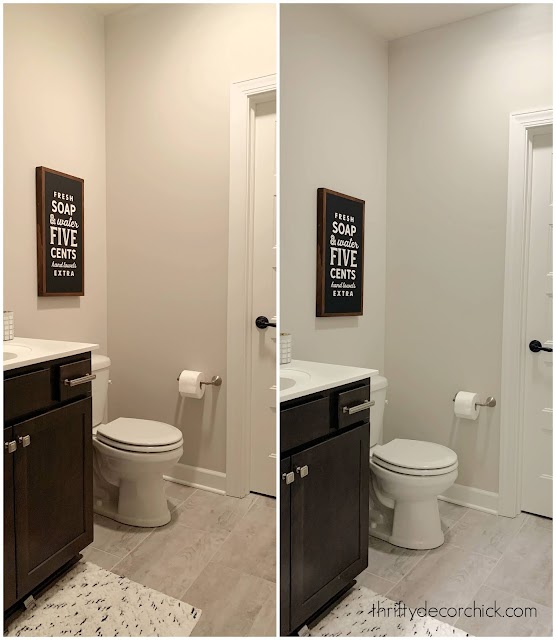
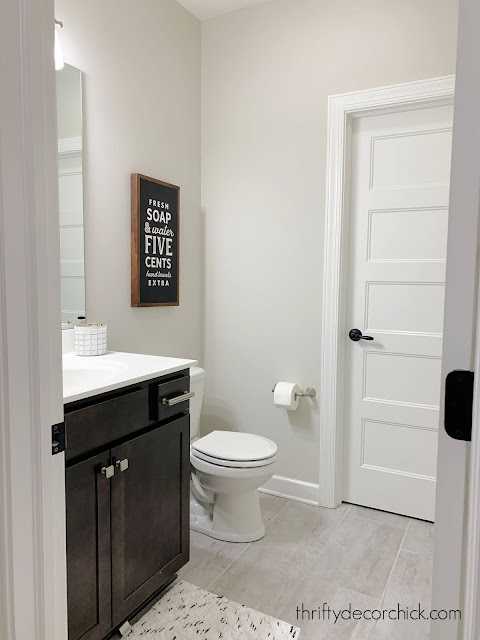
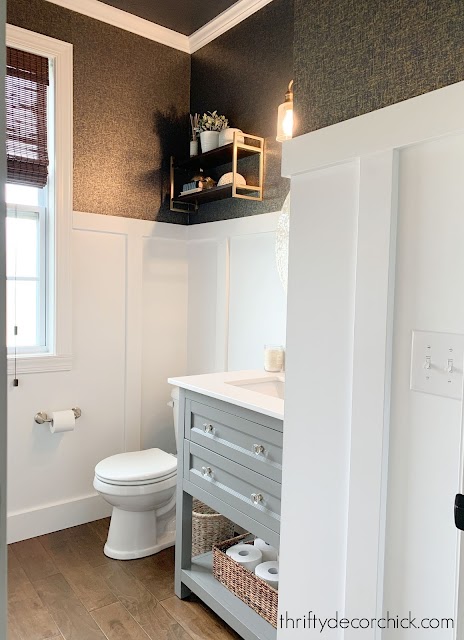
My first go at peel and stick wallpaper was in our powder room. It was pretty bland before: 
simple powder room before
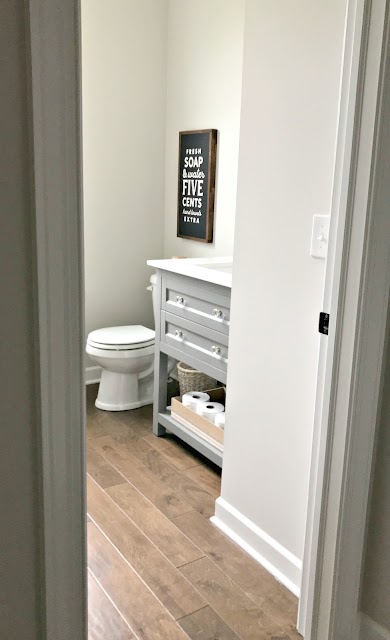
Since I was adding the board and batten wall treatment I only had to cover the top part of the wall, so it was a good beginner project. 
I used a pretty navy and gold design that adds drama in this little space: 
white board and batten bathroom with dark wallpaper

This post may contain affiliate links for your convenience. 
See my policies and disclosure page for more information.  
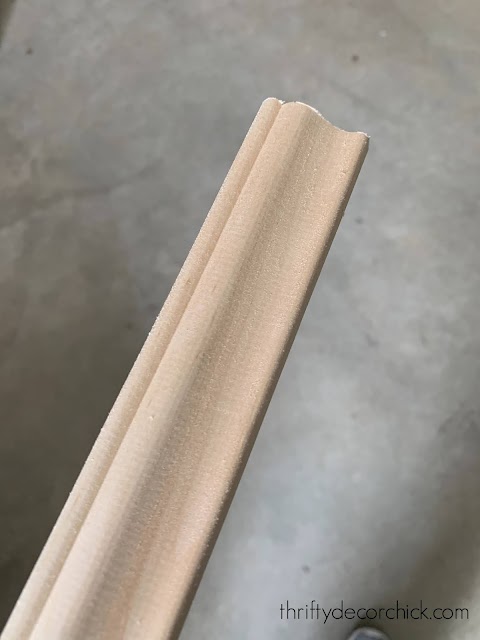
Wallpaper install tip #2:  If you are installing trim and wallpaper, I find it easiest to hang the wallpaper first and then the trim. That way you can slightly cover the edge of the wallpaper with your trim. Same goes for installing it behind shelves — I always hang the wallpaper before building the shelves. 
If ever want to remove it, you can use a razor to score the wallpaper along the trim. 
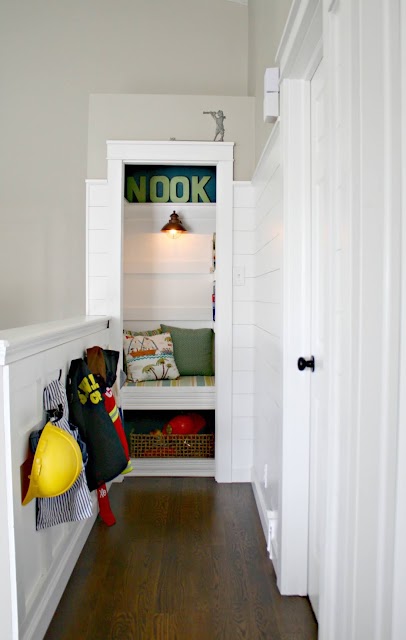
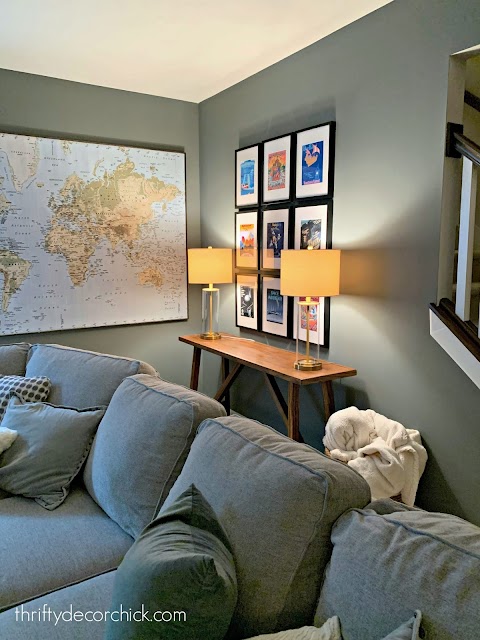
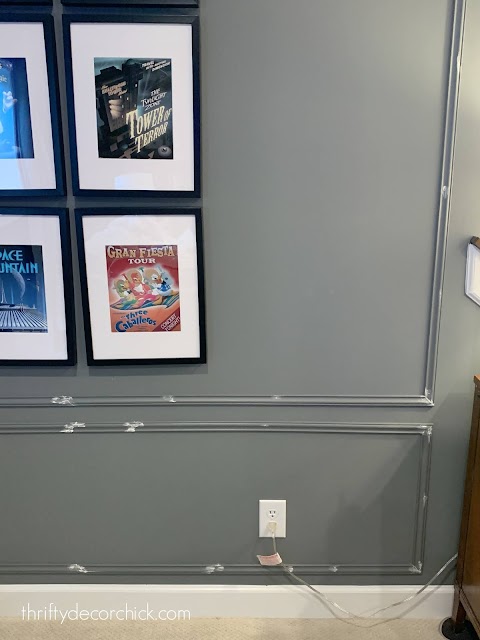
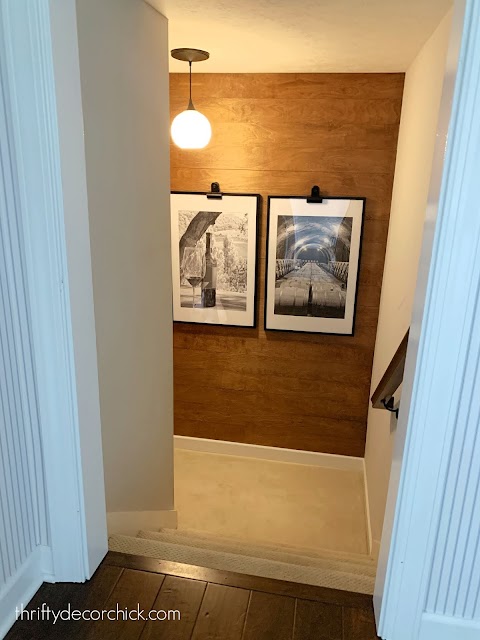
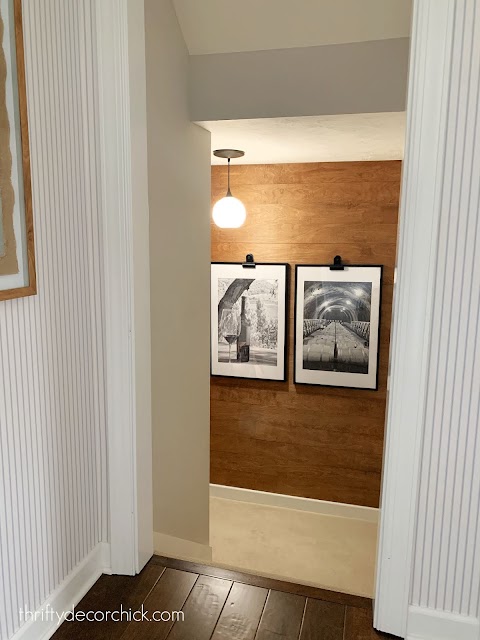
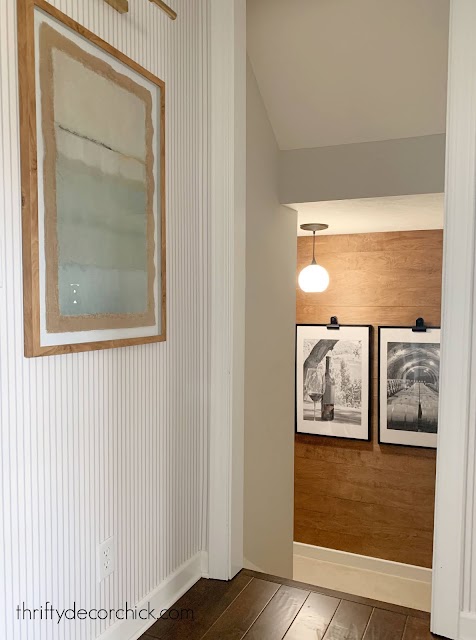
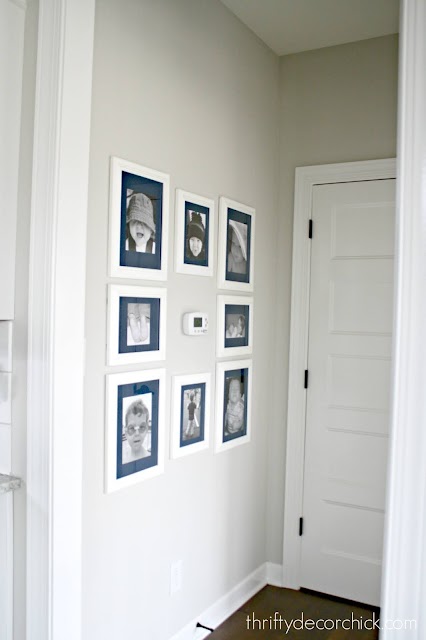
We have a small little vestibule off our foyer that was calling out for a little something: 
small hallway off basement stairs
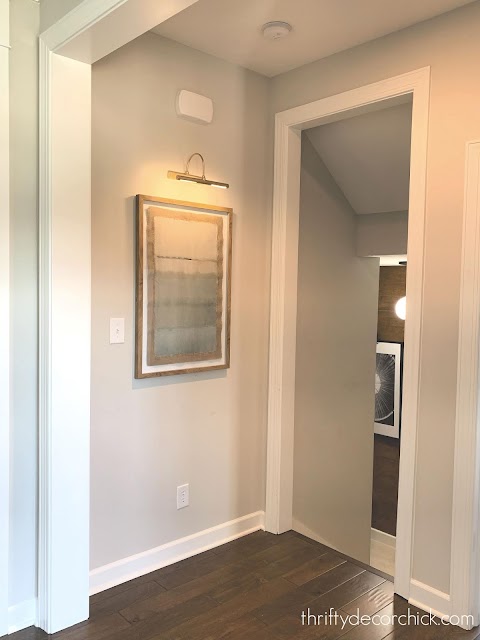
I found the wallpaper I wanted, but because it was the pasted kind, I waited it out to make SURE I really wanted to move forward. 
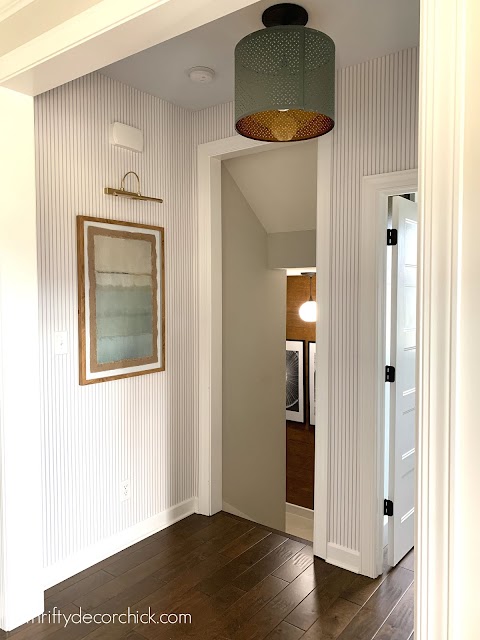
Thankfully the pretty pinstripe design will stand the test of time. I LOVE how this little hallway turned out!: 
pinstripe blue white wallpaper hallway
five panel interior doors

blue and white pinstripe pasted wallpaper
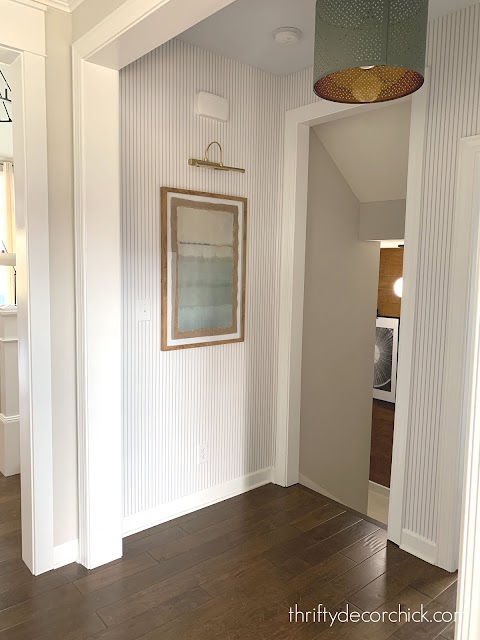
It’s so fresh, clean and classic. 
Wallpaper tip #3:  Avoid stripes. At all costs. 😂 Vertical or horizontal, it doesn’t matter. (There’s a popular shiplap look that I think would be a nightmare to install.) These stripes weren’t horrible, but that’s because I have a decent amount of experience installing wallpaper. But it was the most difficult one I’ve hung. 
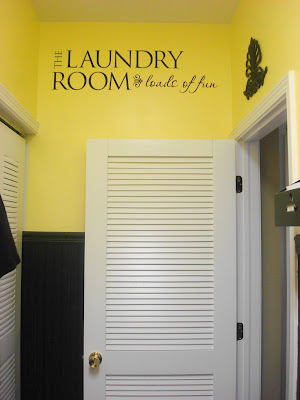
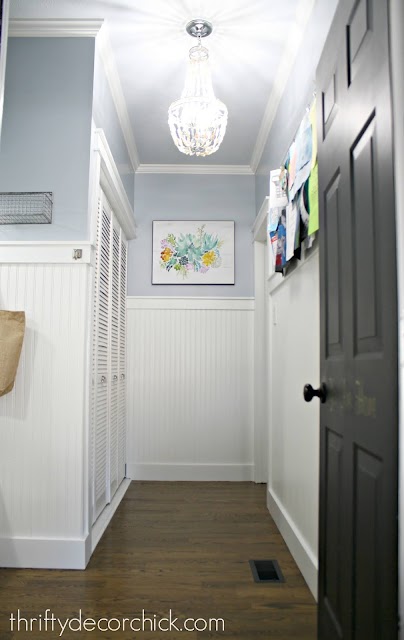
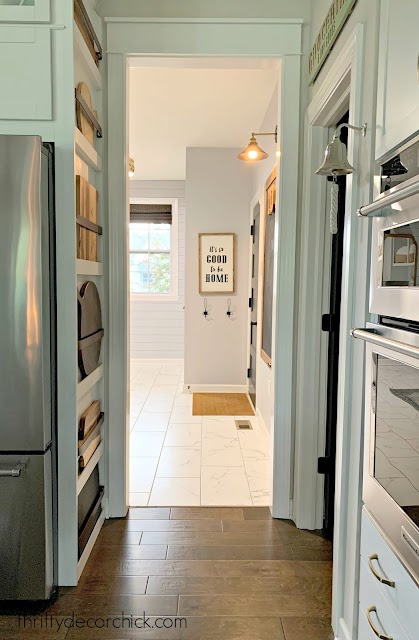
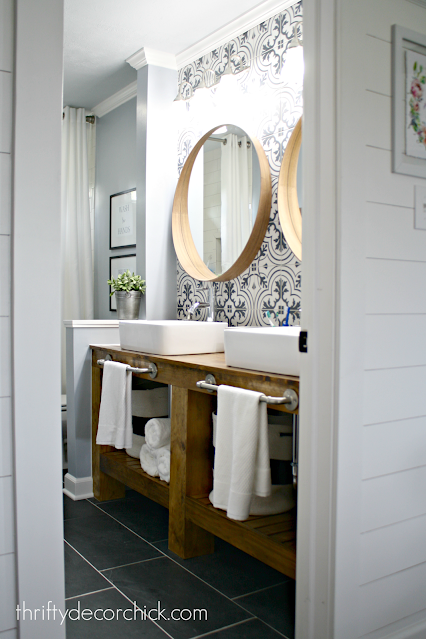
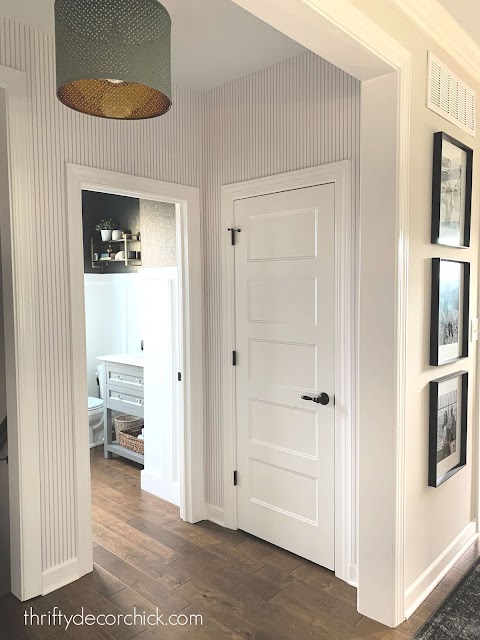
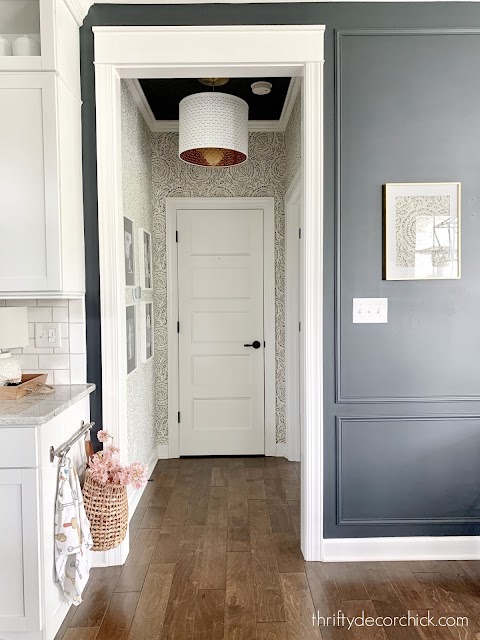
I love dressing up small spaces like powder rooms and hallways! They are the perfect spot to go a little more dramatic, since they are so small. I did just that in this little hallway off our kitchen: 
small hallway art around thermostat
kamala baker indigo wallpaper
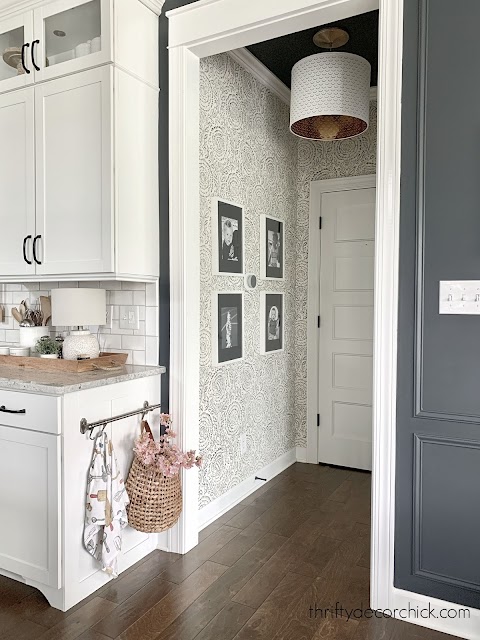
I thought the only place to buy this blue and white floral wallpaper was at Anthropologie, and it was seriously expensive! Thankfully I was able to find it under a different name online for much less. 
This is my favorite wallpaper project to date! I adore this one: 
indigo baker wallpaper small hallway

Wallpaper is a great way to “fill” up walls…it just flows! Our bedroom walls were pretty basic before I added wallpaper: 
decorating with art around TV
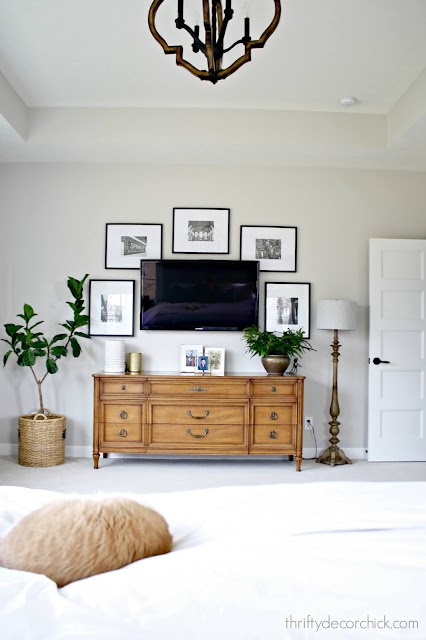
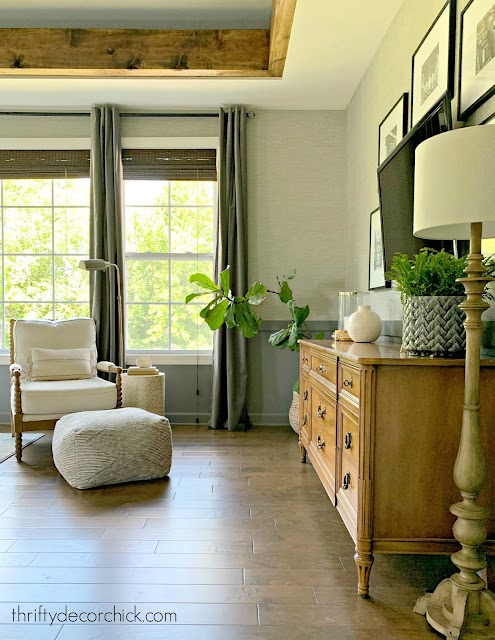
The peel and stick grasscloth wallpaper went a LONG way to cozying up this space! It feels like a hug when you walk in here: 
gray grasscloth wallpaper bedroom
See the full master bedroom reveal here!
Grasscloth is one of my favorites and this version is super inexpensive. 
It doesn’t have the feel of true grasscloth, but it does have some texture to it. And it looks authentic from just a few feet away: 
gray walls grasscloth wallpaper art around TV
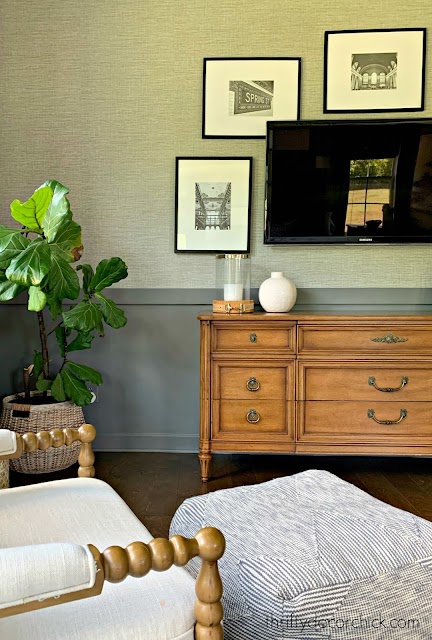
The grasscloth look is more subtle, but sometimes you just want to make a BIG impact. 😀
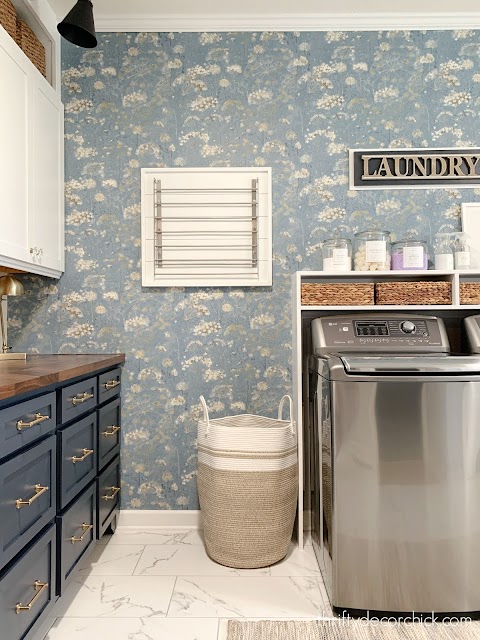
That’s just what I wanted to do in our mud/laundry room. This wall with the drying rack is loooong…it needed something: 
folding table laundry room before
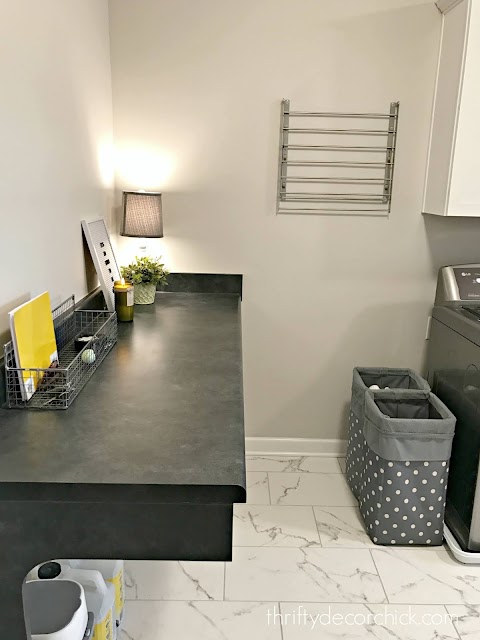
OK, OK — I know a lot of other stuff happened in here, but just look at that beautiful floral paper! What a HUGE impact!:
laundry room with floral wallpaper and hanging drying rack

I think I love wallpaper so much because it solves that problem of, “What can I do with this big empty wall for not much money?” It has become my go-to solution. 😉 
I actually kind of enjoy installing it — it’s like a puzzle to me. If you’ve never hung wallpaper I recommend starting with a small accent wall and using a peel and stick option. (See my tips for hanging peel and stick wallpaper here). That version allows you to remove and restart over and over (believe me, I know). 
Have I convinced you to add wallpaper somewhere in your home yet? I grew up with the old borders in our houses too, but never had to remove them. I know those bad memories have prevented many of you from trying it. 🙂
I have not removed any of ours yet, but when I do I’ll be sure to let you know how it goes! 
Direct links to all of the wallpaper I used here: 
Cherry blossom wallpaper in my office
Tweed wallpaper lookalikes in the basement here, here and here
Similar blue and gold peel and stick in the powder room (our version is no longer available) 
Pinstripe wallpaper in hallway here and here
Indigo and white floral in small hallway 
Similar gray grasscloth in our bedroom here and here (ours is sold out)
Pretty botanical floral wallpaper in the laundry room here and here
See more of our home here. 
To shop items in our home, click here! 
Never miss a post by signing up to get posts via email. 


Source link

Two ingredient pineapple angel food cake


I don’t share recipes around here often but when I do you know it’s going to be either really easy or really good or really easy and good. This two ingredient dessert is both!

I don’t have a source for this, (a friend reposted it on Facebook) so I don’t even know what to call it. Pineapple angel food cake? Pineangel food cake? Pineapple fluffy goodness? 

two ingredient pineapple dessert
I’d dare say that even if you don’t love pineapple, you’ll probably like this one. It’s light and sweet and easy to dress up with simple additions. 
It’s also stupid easy to make. You just take a box of angel food cake and a 20 ounce can of pineapple:
pineapple dessert with angel food
This post may contain affiliate links for your convenience. 
See my policies and disclosure page for more information.  

I’m sure you could use fresh pineapple (just keep the juices!) but wow…this is supposed to be easy remember? 😉

You just dump the pineapple in with the cake mix: 

pineapple and angle food combo
And that’s the only ingredients! When I first saw this I thought, wow, that’s crazy easy! And then I remembered you only need water with the angel food cake mix anyway, but I digress…it’s still easy. 
**Do not add water to the mix per the directions. 

The pineapple juice will react with the mix and make it super frothy and fluffy – it was fun to watch:
mixing pineapple cake dessert
The more you mix it the bigger it will get!

Then you just pour it into a pan and bake for 30 minutes at 350 degrees, (follow the directions on the box for the pan you’re using!) That’s it! (I ended up using a 9 by 13 glass pan the first time but since I’ve used an angel food cake pan like this.)  

I starting eating it right out of the pan and it was SO GOOD warm. Wow. YUMMO.

I soon realized I could make a little parfait:
angel food cake and pineapple dessert small parfait

OK, if you add whipped cream or fruit, it’s more than two ingredients. But I promise it’s delicious on it’s own. (Find similar mini trifle bowls here!)

I layered the pineapple goodness and whipped topping and it was SO. good. The cake was just fine at room temp but like I said, I loved it heated up a little.

So there you go – a super easy, really yummy dessert. It’s perfect for this time of year with the pineapple and great for when you have people coming by and need something fast:
angel food cake and pineapple dessert
Or when you’re home alone in the middle of the day. Whatever. 😉

Have you tried this easy dessert? Any other simple sweet recipes you’ve tried? (Some readers on Facebook said they have tried it with cherry filling too – doing that next!)

This strawberry pretzel dessert is always a hit! Absolutely delicious: 
strawberry pretzel dessert
**Check out my other easy recipes here!

See more of our home here. 

To shop items in our home, click here! 
Never miss a post by signing up to get posts via email. 


Source link

How to extend an outdoor faucet


Hello my friends! Sometimes I find a product I love so much, it deserves it’s own blog post. Whether it’s a cleaning product like this super inexpensive vacuum that I LOVE, or the gorgeous cooking set I found (that still looks great by the way), or even furniture like my most favorite sofa ever. 
This time we’re heading outside for an item I got a few weeks ago but just recently assembled. There are many little details that I wish we had thought of while finishing this house (that started as a spec house). One of those little things that has always bugged me is how low and shallow our outdoor spigots are. 
I wish I would have had them installed higher for easier reach. They are SO low and so close to the stone, it’s difficult to get a hose attached. And as we get older, we avoid struggling with anything that requires crouching. Ha! 
low and shallow spigot on house

We’ve always used hose holders that sit on the ground. You may remember that I spray painted them last year: 
oil rubbed bronze hose holder bowl
This post may contain affiliate links for your convenience. 
See my policies and disclosure page for more information.  
They’ve held up GREAT (I’ll show you in a minute), and I love the look of them, but we wanted something taller. Also, the clippings from the yard are always all over the place and stick like glue. 

I did some looking around online to see if there was a solution that would raise everything (including the spigot) up off the ground. I found the solution! 

This garden hose holder has a faucet that connects to the bib on the house: 
Aqua Joe hose and spigot extender
When the package arrived and I opened it up, it looked like a lot of pieces. I put it to the side for a few weeks till I had some extra time to sit down with it. And then when I did, it took about two minutes to assemble. That’s always the way…what I think will be easy takes 45 minutes and what I think will be difficult takes a couple. 
It’s really just three parts that snap together. It was also super easy to get staked into the ground. (Dampen the soil if yours won’t go in.)
We have a very long expandable hose that I love and I wasn’t so sure it would fit on the holder without pulling it over when filled up. It didn’t even budge!:
hose and faucet extender for hose bib

I love that you can place the holder wherever you want and turn on the water from where you’re at. I’ll be moving the location of the holder to another spot when I get a longer lead hose. That way I won’t have to walk across the back of the house to get to water for our potted plants. 

**I ordered this extension hose to reach to the spot I’m moving it to — it’s supposed to be flexible (our current one is not) and comes in a bunch of sizes. 
I also LOVE that you don’t have to crouch to get the hose or to turn it on. It is so easy to use!: 
extend hose and spigot to garden or yard

We liked it so much I immediately ordered another one for the other side of the house. 

They aren’t the most beautiful holders, but they are streamlined enough that you don’t really notice them. The great part is you can easily hide them behind bushes for or trees too. I’ll probably bury the lead hose in the mulch so you don’t see it. 
I think this is thing is brilliant! It comes with a two year warranty as well. I thought it may solve the same issues you too! You can find the standing hose holder here, the flexible extension hose I ordered and the long expandable hose we love. 
Oh and here’s how the metal hose holders have held up after spray painting them last fall: 
oil rubbed bronze round hose holder
They look great! I’ve figured out a way to reuse them outside, I’ll share that soon. 
See all of my outdoor projects at our home here and those from our first house here:
long concrete patio with round fire pit area

See more of our home here. 
To shop items in our home, click here! 
Never miss a post by signing up to get posts via email. 


Source link

Make your rooms feel bigger with this easy trick!


This quick “hack” opens up your spaces and makes them feel so much bigger! I realized years ago that there were plenty of doors in our house that we never closed. I started to ask myself, can I just…remove them? Am I even allowed to do that? 
The answer is yes…yes you are. 😉 This is a great trick that will give you more space even if you’re renting a home. Just take care when removing the door and store it under a bed so it won’t get damaged. 
**I recommend keeping bedroom doors up for safety reasons. This is why we sleep with our doors closed.
I’ve done this so many times over the years, I even had a few doors removed when we built our house. There’s only one door I’ve taken down since we moved in — on the water closet in our master bath:
floating wood shelves over toilet
How to make simple floating shelves
It’s not a big space to begin with, so taking the door down made a HUGE difference. 
I don’t have a full before pic but this gives you an idea how much space it took up: 

water closet with door
Since we have a door to the main bath, we didn’t feel it was necessary to keep this one. We haven’t missed it once! 
I removed the door from our old mud room to the rest of the house and it made a HUGE difference in there: 

black and yellow laundry

This was a door we didn’t close once…so it was an easy decision. 
Obviously a lot more than that happened in this room over the years, but you can see that the line of sight is so much nicer!: 
mud room with light blue walls white beadboard
Light and bright beadboard mud room
I feel like I gain ten square feet of space in our house every time I do it! 
Removing the door was a given on the book nook I created as well: 
book nook created from linen closet
Bedroom closets are a great place to remove a door — especially if you can only access them through a bathroom. (They won’t be seen by anyone but you!) 
I removed the door on our old closet and we loved it: 
removing door in closet

after removing door in closet
You don’t physically gain that much space, but visually it makes all the difference in the world!

We removed the door to the basement in our last house just a few years after moving in: 
removing door from staircase
I don’t have a before picture, but just imagine the door swinging open to the right…after I took it down we really did gain space in the family room.
I remembered that for our new home and didn’t have one added to our basement stairs: 
blue and white pinstripe wallpaper foyer
See this pinstripe wallpaper makeover here
I also kept the doorway between our mud room and the kitchen open as well: 

kitchen and mud room transition
See how to use the empty space on the side of your fridge here!
It’s all up to your preference and how you live in your spaces!
Our upstairs bath is segmented into two smaller rooms, so I had the door removed and the opening framed out instead. Otherwise the door would have been open all of the time and blocking the natural light from a window. 
**If you are building a home, keep in mind you can have pocket doors installed instead! Those require structural changes you need to make early in the process, so they are difficult to add after the fact. 

I know you’re thinking…what do I do with the holes after the door is down? You can just live with them if they don’t bother you. (I still haven’t covered the frame in our master bathroom!) 
Or you can use inexpensive trim to cover where the door hung: 
covering holes in door frame

Are there doors in your home you never use? Remove one and see how you like it! All it takes to remove a door is a Phillips screwdriver, and perhaps a flat head screwdriver to pry the hinges off. 

See more of our home here. 
To shop items in our home, click here! 
Never miss a post by signing up to get posts via email. 


Source link

The easiest plant for your garden {EVER}

The easiest plant for your garden {EVER}


I have observed (virtually) the least complicated plant/flower At any time. It truly is economical,
grows like mad, does not even need to be truly “planted”…and you can
complete ignore it and it will thrive. Yesss! 

I identified these simple backyard garden tiles past year and can’t even believe that how very well
they are undertaking. I had to share them with you! Oh, and they are perennials
(which implies it stays alive in excess of the wintertime or appear back again immediately after) and even
look good in the colder months. I only desire I experienced known about them quicker.
🙂 

I found this easy to mature plant when I mounted our cafe lights on the
again patio very last year: 

Our lights are industrial grade and large so we essential a way to protected the
planters so they would hold the excess weight. 

easy to grow succulent tiles in planter

This submit may perhaps contain affiliate back links for
your convenience. 

I advised you then how I applied one particular of these sedum tiles to fill both of those planters. I
figured they would just very last by way of the tumble, but to my shock they were being
still looking beautiful in the center of winter! 

I went out a single snowy day and couldn’t consider these have been continue to searching
awesome in the frigid temps with snow all above them — total of colour and not
dying off a person bit. I imagined for certain they would ultimately fade, but
nope. 

They look unquestionably amazing now: 

evergreen succulents in containers

Technically sedums are succulents, so it is surprising (to me) that they are
fundamentally evergreen (in up to zones 6 and 7!). Huh. You discover something new
each individual day!

That planter has more of the eco-friendly and yellow blooms, but the other one has
more crimson and orange: 

beautiful succulent sedum tiles

They definitely are lovely, appropriate? So intricate and delicate, they are
more robust than they seem! The sparse blooms in that right before pic have developed
like insane and are spilling over the edges of the planters. 

I surprise if the variance in colors is since one particular may perhaps get a lot more sun than
the other?: 

easy garden tiles in planters

I want to transfer that hydrangea to a new place. The sedum has taken in excess of!

I was fired up when I noticed them again the other working day (I uncovered mine at Lowe’s
but you can discover them on the net as well) and grabbed one particular for below our
mailbox: 

easy to grow succulent garden tiles

They would appear terrific in involving pavers on a patio or a walkway, along plant
beds or in containers like we have in the back. 

The most effective element — you practically just place them on the filth. No digging, no
relocating dust all-around. Just lay them down, drinking water often the initial pair of
months and then start ignoring them like I did. 😂

I conveniently tore them into items for the patio planters last 12 months, but this time
the bottom was thicker:  

easy sedum garden tiles

I just took scissors to get it began and then I was capable to tear parts
off. 

Now I’m thinking about putting them in our front porch planters as properly —
it would be so pleasant to go away the planters as is for all of the
seasons!

I adore gardening and I have hardly ever observed anything at all this simple to plant,
that grows so quickly, that seems so good. Oh, and the price is Good since
you need very small to get a spot started out. Within months it will be start out
spreading and fill in properly. 

Heck…these would be good for window boxes as very well! I’m a minor obsessed.
Have you tried these uncomplicated vegetation? So effortless and they glance so superior! Was any person
else shocked these are evergreen? 

DIY landscape lighting


Supply website link

Install molding to add interest to basic walls


I’ve been working on this wall molding project for almost four months and it’s finally done!! Geesh. I started it right after I finished the HUGE wall of bookcases in the basement but I kept getting distracted by other projects that were brighter and shinier. 😉 
The mud/laundry makeover and the garage clean out and organization took up a couple of those months. And then I was just…well, tired from all of that. A couple of weeks ago I finally started up this panel molding project again. 
It took longer than expected because when do a project like this, one thing always snowballs into a million other smaller projects. Every. time. But I’m REALLY loving how it turned out and I’m also really happy I added all of the smaller projects. 
When I finished the wall of built ins down here, I knew right away that the other walls needed something: 
dark Westchester gray walls and built in
I’ve planned to do these molding boxes for a long time, but knew I needed to wait until after the built ins were done to determine the size. 
We LOVE the dark, moody gray we have down here (Westchester Gray), but painting the walls made me even more sure that the wainscoting would look REALLY good:
Disney ride poster wall
I had to decide on the design first — I only had three wall sections that I wanted to add trim to. I took a photo of one wall and then added lines using my phone editing. 
The traditional two boxes was what I initially wanted to do: 

Figuring out size of panel molding
But I thought I’d try out adding one more at the top and loved it: 
Three box panel molding
This post may contain affiliate links for your convenience. 
See my policies and disclosure page for more information.  
I used the simple decorative trim I used in our dining room as well. It’s simple but elegant, and not crazy expensive: 
Simple decorative trim for wainscoting

You can find it at Menard’s, Home Depot and Lowe’s. It was harder to find this time though! It feels like everyone in the world is working on DIY projects right now. 🙂 
I painted our walls in a flat sheen, but I always use semi-gloss on trim. I painted so many of these eight foot pieces…with brushes, rollers, and then with my favorite find, this little paint pad: 

Painting pad for trim
It was great because I could just dunk it in the paint in the can — no need to pour into a tray. It got into the little groves easily and made quick work of the painting. I think I got mine at the dollar store, but this is a whole set! I usually wait until the trim is on the wall to paint, but since I was doing a different sheen I painted before. 
I installed the crown molding and then cut scrap pieces of wood in the sizes I needed to space out my boxes. Each box was 3.5 inches away from the nearest wall (except for around the window where I did twice that to accommodate for the drapes). 
I spaced each panel two inches from the top, bottom and between each box:

Using measured scrap to space trim

Having those cut helps tremendously…you can easily check to see that everything is spaced out the way they should be. I also checked for level as I was installing them as well. 
I finally bit the bullet a few months ago and bought this battery-powered nail gun and it is a game changer! I’ve been carrying around a compressor and fighting the air tubing for 15 years. The cordless nailer is SO much more convenient, but definitely heavier. 
The molding needs to be cut at a 45 degree angle because of the detail:  
45 degree cut for wall molding boxes

This is why I usually paint after the trim is on the wall — after caulking and filling holes, you have to do more coats anyway: 
Filling and caulking trim work
Although I didn’t caulk at all with this trim. It fits pretty flat against the wall. Get the nails into studs where possible, and for other spots you can nail at an angle to secure it well. 
When I was done I knew there were some more things I wanted to tackle. Those skinny molding boxes at the top were crying out for some lighting! I so wish I had all of these ideas in my head when we were building, because I would have added electricity then. 
But I didn’t, so I went with my go-to, the battery operated sconces I used in our wallpapered foyer upstairs:
Brass battery operated art lights
I shared how to add sconces without electricity as well here! It’s such a great hack. These art lights are great — I just don’t love the brass tone. So like last time, I sprayed them a more consistent brass color. 
I moved some of the art around, changed up some of the decor and painted the baseboards to match the rest of the walls. At the last minute I also added some additional trim in the angled part under the stairs:
Panel molding under stairs

That took me forEVER. The angles were not computing in my head and it was a couple hours of checking angles and going up and down the stairs to the garage to cut. Twenty-five times or so.
I moved the mirror that was here and replaced it with these AWESOME round whicker wall hangings: 
Large round wicker art
Holy cats, I love them so much. So, so much. I want to hang them all over the house! They look so good and you get the whole (huge!) set for under $100. 
All of the projects were SO worth it…it looks so good!!:
Panel molding on dark gray walls

Dark gray walls with wood and brass accents

Gray bookcase and wall molding

Three panel wainscoting on walls

Large gray sectional with chaise
I always love crown molding in a room too. It’s a traditional touch that adds so much character. 

I love this space most at night when we have the recessed and bookcase lights dimmed and the art lights turned on:

Dark gray walls with wood accents
Vintage wood dresser gray walls

Huge framed ikea world map
The molding is the perfect finishing touch down here. If I’ve said it once I’ve said it a million times…trim work makes SUCH a big difference for not a lot of money. I spent about $150 for the molding, but it usually costs less than that. (The trim has gone up $2 each since I bought it a few months ago!)
I used a lot because of the three sections and large size, so this project could easily be done for under $100!
Here are a few before and after pics…this space has seen so many DIY projects over the past four years!: 
before boring wall
TV entertainment center wall
Large ikea world map art
Dark gray walls family room
Lazboy gray sectional with chaise
Dark gray walls basement family room

Analytical gray family room walls

Cozy basement family room with dark gray walls

We are spending more time down here than ever! It’s definitely our favorite spot in the house lately: 
Large wall panels using molding
I’m so happy to have another project crossed off the list. Now onto easier items like some organizing! 

Questions? Here are the projects and items in our basement family room:

Built in bookcase how-to

DIY olive tree tutorial 
Crown molding cutting and install tutorial 
Changing out the recessed lighting to brighter/more efficient fixtures
Read all about out sectional here
Round wicker wall hangings
Similar floor cushions 
Battery-operated art lights 
Painting pads 
Most of the pillows on the sofa here
Slide in sofa table 
Drapes and giant map are from IKEA
Dresser is vintage
Rug was a HomeGoods find years ago
See how I added this panel trim to our dining space here: 
Cyberspace dark blue walls with molding
And ALL of my wall molding projects over the years here! 

See more of our home here. 
To shop items in our home, click here! 
Never miss a post by signing up to get posts via email. 


Source link

Two EASY hacks to clear backed up drains


EASY and inexpensive ways to clean gunk out of a drain

There are two simple and very effective ways to clean to clear gunk and hair out of your drains without using harsh chemicals. And with one method you’ll have everything you need in your kitchen. 
One of these drain clearing methods works better in the kitchen on built up foods and fats, and the other works well in bathroom sinks and showers where the clog culprit is most likely from hair down the drain.
We used to grab the Drano (and an even more caustic product once — never again) every time the water started to slow in our sinks. No more! These methods work every time and it only takes a few minutes to use each drain cleaning hack. 
brushed stainless faucet white bathroom sink
Why you should clean your sink drains
Well I think most of us understand why. At least we know when sinks start to drain slow they need to be cleared out. But I’m guilty (and I think a lot of us are) of not doing it enough
In a kitchen, there are fats, oils and other foods that gunk up pipes over time. (Did you know even pasta is bad for your pipes?) In the bath, it’s the dreaded hair. And unless you’re diligent and stay on top of it all the time, clogs happen eventually. If you’re not treating your drains right, eventually you’ll need to clear out the pipes. 
And your sink will probably be stinky. Ever had a foul smell in the kitchen you can’t place? This is probably it.
Cleaning out the food goo and gunk

This one is typically used in kitchens where you have the thick build up of fats and gooey food. I used to use the old school method of hot water, then baking soda and finally vinegar to clear a kitchen drain. 
But years ago I heard of a more effective and even easier way to get it done…and I’ve never gone back! I try to do this every six months or so, but as we’ve already discussed…drains aren’t usually something I think of cleaning regularly.
You’ll only need a couple “ingredients” to flush the built up food and fats in your kitchen drain. 
First up, boil a saucepan full of water. If your drain is already backed up or running slow, you may need to do this numerous times or boil a lot more water to start:
boiled water and detergent for drain

My inexpensive black and brass cookware is still looking great! 

Stir a few tablespoons to 1/4 cup of dish detergent into your hot water (less for smaller pan, more for larger pot) and then let the water cool just a bit

It is not recommended to pour boiling hot water down sink drains that are backed up if you have PVC pipes — if clogged, the boiling water can sit and start to melt the pipes. 

Also, a porcelain sink can crack from boiling water. 
Yet another reason to do this before your drain pipes clog up! 
Pour about a half of cup of salt (any salt will do) down the kitchen drain: 
black granite kitchen sink wood counters
This post may contain affiliate links for your convenience. 
See my policies and disclosure page for more information.  

Then wash the salt down the drain with the very hot, soapy water. Rinse with hot water from the faucet:   
kitchen sink clog hack
It works like a dream! It had been ahem…a while since I had last done this and this time we could hear gurgling as the pipes cleared out. They continued to gurgle for about 30 seconds after I poured the combo down the drain. 
You can read all about why this works better than using baking soda and vinegar for clearing drains here. 
When food isn’t the problem
In bathrooms the problem is rarely from food, but hair instead. Sometimes soap scum too, but hair is usually the culprit. And then soap and goo get stuck in the hair, and well…you know.

This where it gets gross my friends. REAL nasty. I am sparing you the after pictures from the last time I did this in our bathroom. 

This plastic Zip it drain clearing tool makes removing the built up hair in your drain SUPER easy. It’s so easy to use and they are crazy inexpensive. 
Zip it is the OG of these tools and there are tons of knock offs now. I think this one is the latter: 
easy tool for cleaning hair out of sinks
Overall I find the Zip it brand lasts longer than others. 
These little doodads are long plastic drain cleaners with little threads that grab all the hair on the way down and back up: 
plastic tool for cleaning drains
You simply thread it down your bathroom drain as far as you can. No need to remove the stopper. 
If it doesn’t easily slide down one side of your stopper, try again in another spot:
plastic drain cleaner for hair build up
Pull it back up and then try not to hurl. If you’re a decent human being who doesn’t let any hair down the drain you won’t notice much. But if you’re like most of us, you’ll need to be prepared for what will come back up the drain. 
If it’s been awhile I usually have do this a few times to clear all the hair from the sink. But that’s IT! You’ll be shocked at how much faster your water drains. 
And there you go…a clean drain that lets water move freely: 
unclogged bathroom drain in white sink

This plastic tool will work on bathtub and shower drains as well. 

I would not recommend using this on a kitchen sink drain with a disposal.


Things to consider when using either drain cleaning method:
  • Remember, (especially if you already have a clogged drain), avoid using actively boiling water in your sinks. 
  • Be gentle! If your drain cleaning tool doesn’t move easily in and out of the drain, you’ll need to jiggle it a bit as you use it. It will get easier to move as you clear out the hair.
  • Some consider the drain tools to be one use products, but I use them over and over for years. (Unless you are gagging from what comes up and want to throw the whole thing away.) I grab some tissue and grab the offensive clog off of the plastic piece. The only time I ever replace them is when all of the “teeth” have come off the sides. It will still grab some hair, just not as much.
  • As I mentioned earlier, if your build up is more severe, you’ll need to attempt these methods a few times to get the gunk completely cleared out.
There you go! The easiest ways to clear kitchen and bathroom drains in seconds and with very little expense! Most of the time there is no need to use harmful chemicals to clean out your sink drains and pipes. 
**The Zip it brand drain tool is my favorite, but this option comes with even more — you can keep one at each sink! 
**This pop up cover prevents hair from going down tub drains and this one is great for shower drains. 
Have you tried either of these methods for your clogged sinks? 
My DIY jewelry cleaner “recipe” is another favorite cleaning hack!:
at home jewelry cleaner recipe


See more of our home here. 
To shop items in our home, click here! 
Never miss a post by signing up to get posts via email. 


Source link

Delicious strawberry pretzel dessert recipe


It’s strawberry season! This crunchy and sweet strawberry dessert is a hit EVERY time I make it! It’s one of my favorite desserts ever. I’m not a big cook so when I share something here you know it’s going to be good and easy. This is so yummy! It’s a perfect combination of sweet and salty, my favorite. 

A friend of mine used to make this every time we got together and it got to the point where I would request it. I finally asked her for the recipe and now it’s my go-to for summer get togethers. (But it works ALL year round!)
Strawberry cream cheese and pretzel dessert
Here’s what you’ll need to make this Strawberry Pretzel Dessert: 

  • 2 cups crushed pretzels (make sure this is two cups after you’ve crushed them — I actually use a little more)
  • 3/4 cup butter, melted
  • 3 tablespoons sugar
  • 1 (8 ounce) package softened cream cheese
  • 1 cup sugar
  • 1 (8 ounce) Cool Whip
  • 2 (3 ounce) packages of strawberry gelatin
  • 2 (10 ounce) packages frozen strawberries (I use one 14 ounce package and it’s fine)
  • 9×13 pan 
To make the “crust” take your pretzels and smash them — I put them in a baggie and pound them: 
crushed pretzel dessert
This post may contain affiliate links for your convenience. 
See my policies and disclosure page for more information. 
Then mix the pretzels, melted butter and three tablespoons sugar: 
pretzel and strawberry dessert
Spread them into the bottom of a 9 by 13 pan till covered. (This is the pan I use — there’s also a cover that makes it really easy to transport.) 
Bake at 400 degrees for eight to ten minutes and then set aside to cool:
Strawberry and pretzel dessert
You’ll want this to cool down before adding the next layer so I wait until this is out of the oven before continuing. 
Mix softened cream cheese and one cup sugar:
Strawberry and cream cheese dessert
Make sure your cream cheese is softened (place in microwave for 10 second increments) to ensure you don’t have chunks. 
Fold in the container of Cool Whip: 
Strawberry cream cheese and pretzel dessert
Try with all your might not to eat it right then. 🙂 Little fact about me — I could (and do) eat Cool Whip with a spoon. Delish. 
Spread this mixture onto the pretzels: 
Easy summer dessert
Important tip — make sure to spread the cream cheese mixture to the edges and don’t leave any holes. This will keep your pretzels nice and crunchy. 
Next is the gelatin — prepare in two cups of boiling water (according to the box instructions, just leave out the cold water at the end). Then add the package of frozen berries: 
Strawberry dessert with pretzels
You’ll want this to set up for a bit — the recipe calls for it to be a egg white consistency. I usually put it in the fridge for five to seven minutes and stir. You’ll be able to tell when the gelatin is starting to set up.
Spread the strawberries over the cream cheese mixture. Let set up even more in the fridge — even an hour is fine. 
I’m telling you — this is SO good. I warn you though, it’s addicting. You’ll have some and then need more: 
Pretzel and strawberry dessert in trifle bowl

I love the combo of the creamy and crunch and sweet and salty. It’s a lovely summer dish — I hope to make it again with fresh picked strawberries soon!

Have you tried this dessert? Any twists on it that are worth trying? You can even add some blueberries on top for a patriotic look. 🙂

Pin and save this one for later with this image: 

Strawberry cream cheese and pretzel dessert

Check out all of my recipes here! These are a few of my most popular…
Easy banana bread: 
easy banana bread
EASY strawberry freezer jam: 
simple strawberry freezer jam
No bake peanut butter pie: 
no bake peanut butter pie

Classic sangria recipe: 
red sangria in glasses
See more of our home here. 
To shop items in our home, click here! 
Never miss a post by signing up to get posts via email. 


Source link

Brilliant solution to store & protect large photos


I’ve shared my goal to better organize our (thousands) of photos and school moments and projects a few times over the years. It’s one of my biggest organizational thorns in my side! I’ve never found a great way to store photos, especially in a way that we can really enjoy them. 
I’m sure many of you are asking why I haven’t just used photo albums, and I do plan to add them to albums eventually. I haven’t done that yet because we had WAY too many photos to even begin adding them to albums. And so many of them are too big to fit into the albums we have. 
You can see how many boxes of photos I had when I shared our organized linen closet a few years ago:
organized linen closet with photo boxes
You can see how that started as my “Monica closet” here. 🙂 That didn’t include the larger boxes full of bigger photos as well. 
I’m so thankful to have all of these pictures! Most of them are from my childhood and older family photos. Unfortunately I have very little as far as mementos from my youth so these photos are a real treasure!
Earlier last year when the world slowed down, I vowed to take the time to sort through ALL of the photos. I spent many nights going through each box, sorting and decluttering. We had SO many double photos (you youngins won’t even know what I’m talking about!). Remember when you could get two of each photo developed? 
I tossed ALL of the doubles and also tossed photos of people I didn’t know. I’m not talking about long lost family members, but childhood friends I don’t remember, or photos my parents took of people I don’t remember at all. (My mother passed away last year and my Dad didn’t want them.) 
I decluttered our photos before a few years ago, but it’s definitely easier to let go of more as I get older. 😁
I sorted what I had left into decades and organized them in the photo boxes that way. I cut the boxes down from eight to four!
I still had the issue of organizing a TON of large photos — sized 5×7 and up. I threw all of them into larger boxes like this one so they were all in one spot: 
large photos stored in box
This post may contain affiliate links for your convenience. 
See my policies and disclosure page for more information.  
It’s bugged me that these have been piled up in here instead of organized so we can enjoy them. A few weeks ago I came across the answer to my problems!
I’m not sure if I can adequately describe my love for these simple art portfolios. They are the answer to so many of my paper organization woes! They come in a bunch of different sizes: 

various sized portfolios for photos and art
When I got them I knew they would work really well to organize paper items as well. School papers, cards, mementos — anything paper! I have books in the following sizes: 
  • 11×17 for large photos and art (they also carry this 11×14 size)
  • 9×12
  • 8×10 for larger photos and paper 
  • 5×7 
  • they also have a 4×6 size (two per order)
Each one has 24 pages, room for nearly 50 photos or sheets in each album.
So far I am thrilled with these portfolios! They are super simple and clean atheistically — easy to wipe off and plenty sturdy: 

simple black photo portfolio
But they also give enough that you can fit a TON inside and they still close nicely. They have held the bulkier kindergarten art projects beautifully. There is a small spine that you could label as well. 
I am so very happy with these books. I started with the 8×10 size for my parent’s old photos and pics of my grandparents: 
protecting old photos in portfolios
Aren’t they a beautiful couple? 
**As I was filling these albums, I realized how sad it would be to have them closed away in these forever. I’m determined to create a wall display somewhere in our house. There’s truly nothing like these vintage photographs and I’m looking forward to showing a few off! 
I’ll update you when I figure out where and how I’m going to do that. 🙂 
It really is such a relief to have them nicely stored away where they will be protected. AND we can turn the pages like a book and enjoy looking through them now. It’s a huge upgrade from having them piled in a box!
Speaking of boxes…I shared years ago how I had been storing our son’s school art and papers in these large boxes: 
storing kid's artwork in boxes for each year
It actually worked GREAT while he was young (after elementary I didn’t keep nearly as much) because I would start a new box every school year. I had it out in our kitchen and would throw in papers I wanted to keep as he brought them home. 
But years later…I’ve realized that yet again, they are just sitting there piled up. We never, ever look at them! I wanted to be able to look through them like our photos, so I’ve been using the larger sized portfolios for his artwork: 
storing large kids artwork in portfolios

That 11×17 size is perfect for the big art! I’ve used one of the 9×12 albums as well. 

Something else occurred to me as I’ve been sorting through these papers…I’ve kept them for ME most of all. I do want our son to have some of these pieces of his childhood, but I don’t have any expectations that he’ll be dying to take them one day when he moves out. 😉 
I think when he gets married and has children, he may want them. But for now, this is for me! And that’s OK. With that in mind, I’ve started getting harder on myself to only keep the really cute stuff. I realized after filling one 9×12 book with papers from just kindergarten that perhaps I should let go of just a BIT more. Ha!
These portfolios are such a simple thing, but are a solution I was desperately searching for! I love that the photos and paper are nicely organized and protected, but we can easily access them and enjoy those memories. 
I’m not done yet — it will probably take me a couple weeks to get through everything and organize it how I want. But it will be SO worth it!! Then…I’ll just need to get the thousands of photos off my phone so we can enjoy those
**By the way, I’ll be sharing these and some of my other organization favorites on Amazon Live tonight (Tuesday)! Come watch at 8 p.m. EST and say hello. 🙂 You can see the live here.
Brilliant solution to store & protect large photos

Or you can follow my Amazon Storefront hereand you’ll get a notification every time I go live. If you miss it, I’ll update this with a link you can watch later. (You can see it here! Thank you to everyone who joined!) 


See more of our home here. To shop items in our home, click here! Never miss a post by signing up to get posts via email. 


Source link

The daylight bulb difference {Amazing!}


Natural light is one of the easiest ways to make a room look it’s best! It shows off the true colors of everything and feels fresh and clean. For years I’d want to recreate that feel in our smaller spaces or rooms without windows, but the yellow tint of our light bulbs made everything feel drab. 
Regular warm light bulbs cast a tint on everything that changes the color. Incandescents were the worst offenders, but even some of the energy efficient bulbs nowadays give off that yellow hue that changes the color of the room. 
Years ago I found the easy the solution that is (literally) as easy as replacing the light bulb! Enter the daylight bulb…the easiest change you can make to make a room feel fresh and bright! I’ve been adding these all over since I discovered them years ago. I still find spots in our home that would look better with the daylight bulb. 
I added this inexpensive wood planked wall on our stair landing soon after we moved in, but the yellow tint of the bulb has bugged me: 
easy inexpensive wood wall horizontal
This little alcove upstairs gets tons of natural light, so the warm light felt really out of place. 
Look at the difference in just a quick change of the bulb!: 

wood planked wall on stairs
This post may contain affiliate links for your convenience. 
See my policies and disclosure page for more information.  

foyer with wood wall on landing
That’s the actual color of our carpet! 🙂 I’ve done this tons of times and it never fails to amaze me how great everything looks! 
I don’t use daylight bulbs in every room — I prefer warmer light in our living spaces and bedrooms. But in bathrooms, storage rooms, hallways, closets, laundry rooms…it makes a HUGE difference. 
I install them in bathrooms no matter how much natural light the room gets. Our basement bathroom was feeling super dingy with the warm halogen bulbs our builder installed. I replaced those (left side) with the daylight (right), and what a difference!: 
daylight bulbs before and after
If you use these you’ll notice that anything white looks MUCH better with a daylight bulb. And you can see the actual color of the Agreeable Gray paint on the walls. 
By the way, in the before the bulb was 100 watts. The daylight was only 60, and still looks brighter! 
With both the fan and vanity lights changed out, the difference is huge: 
bathroom with tile dark vanity

I could be imagining it, but daylight bulbs seem to help to brighten my mood as well. The dreariness is gone, and the fresh light looks so good! 

I prefer daylight bulbs that have more bulb and less plastic, like these: 
daylight LED bulb
Some LED lights have the plastic base that covers half of the bulb and I feel like those don’t let off as much light. I get a lot of ours at Home Depot (they have a big selection) but you can find them here as well. 
I first found these when I did a small makeover on our son’s old bathroom. This is the difference the daylight bulbs made with the old vanity light: 
difference between daylight and incandescent bulbs
Isn’t that crazy? I didn’t care for the old glass, even though the new bulb really did help. 
Here’s the difference with the new bulb and the new brighter glass as well: 
Comparing incandescent and daylight bulbs
We couldn’t even believe how different it felt in here! It was like there was a window opened and letting the sun in. 
After I installed these I left the light on, came upstairs and for a split second thought daylight was streaming in the bathroom. I knew there wasn’t a window but my mind was tricked for sure. 
The daylight bulbs make everything their true color. This was with incandescents: 
easy bathroom makeover
Here’s the after: 
Daylight LED bulbs in bathroom
This is what I mean by the real color of the room. It’s amazing! Daylight bulbs really let your rooms shine the way they should! 
They come in different wattages, but overall they are brighter no matter what. In this room I immediately installed a dimmer because first thing on a dark morning they would be way too much. (Most are fine to use with a dimmer, but double check.) 
I tell you what — you see a lot more with the daylight bulbs. You know how you think you look pretty good in your bathroom and then sometimes you go out and you’re like, whaaa? Yeah. These show you all of that before you go out. 🙂 
Have you tried these “natural light” bulbs in your home? You can see all of my lighting tricks and tips here! 
P.S. See that bathroom after I remodeled the whole thing here!: 
The daylight bulb difference {Amazing!}

See more of our home here. 

To shop items in our home, click here! 
Never miss a post by signing up to get posts via email. 


Source link