[ad_1]
After finishing up so many HUGE projects lately (the basement bookcase wall, garage makeover and mud/laundry makeover) I’m back to focusing on some smaller projects in our basement. I started one a couple months ago and left it in the dust when I focused on the garage clean up. Oh look, a butterfly! 😂
Now I’m working to finish that up and a couple other smaller projects as well. This was a quick one thankfully, and looks great! I’ve shared how to add metal sheeting to cabinet doors before, (you can see the fireplace makeover at our old house there) but this time it was even simpler. I figured I’d share how I did it.
Why add metal sheeting you ask? Well when you like to have electronic components hidden away like me, it’s best to give them some air flow. Otherwise they run hot and that wills shorten the life of the components. Also, your remotes won’t work through a wood cabinet door, but will through metal sheeting.
You can also use an RF remote control system that allows you to keep your TV electronics in another room — I’ll add a link to that at the end of the post. We didn’t want to use that because we use the voice controls often.
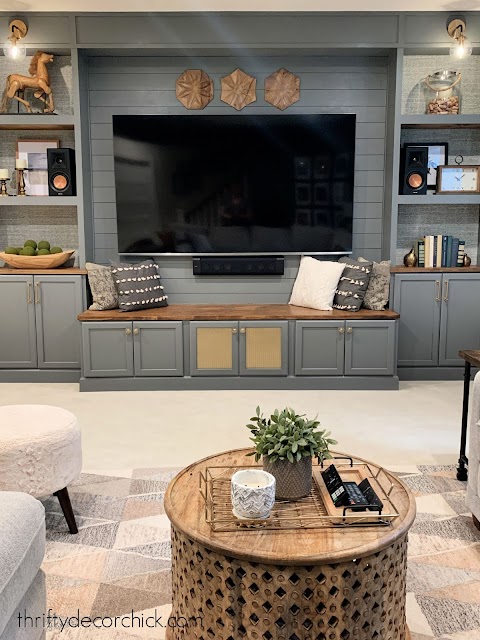
Here’s a reminder of how this project ended up:
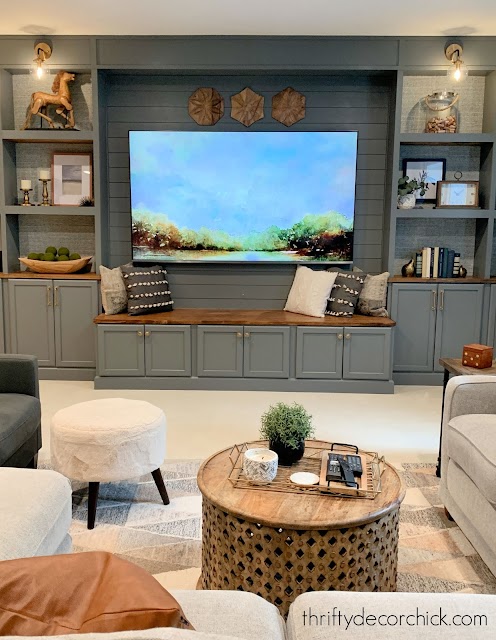
This is one of my favorite projects ever…I adore it.
I cut the back out of two of the bottom bench cabinets in preparation for the electronics to be added later. We knew we’d have a receiver down there at the very least, and I wanted to allow for more air flow and access from the backs of the cabinets.
A few weeks ago we had the first part of our sound system installed, and every time we turned on the TV we had to open the cabinet to get the remote to work. Then a cat or two would crawl back there…so I knew it was time to get those door fronts replaced.
I removed the cabinet doors from the hinges and used a large drill bit to make holes in the four corners of the front panel. This gives you a spot to insert your jigsaw blade:

This post may contain affiliate links for your convenience.
See my policies and disclosure page for more information.
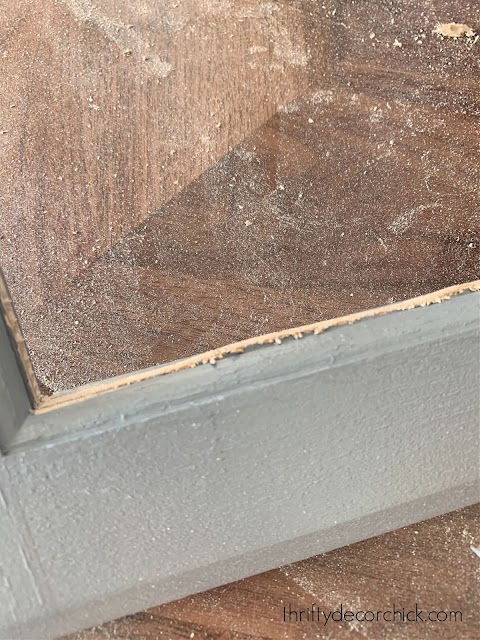
This is where I did things a little differently than last time — I sawed right up to the edge of the center panel against the cabinet frame. This takes a little bit more of a steady hand but it doesn’t have to be perfect!
I had plenty of spots that weren’t perfectly flush:
I grabbed my favorite little sander and used a coarse grit pad to get those parts flush:
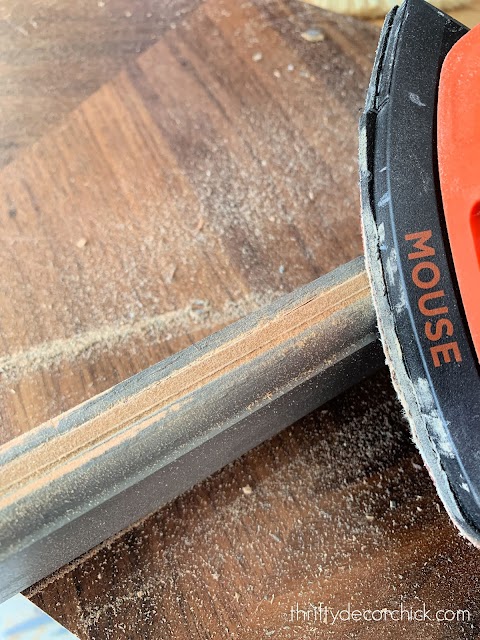
It worked really well! I cleaned all of that up and touched up the inside parts with the paint color, Westchester Gray by Sherwin-Williams.
Last time I did this I used a silver metal sheeting with a dark gray on our old fireplace built ins. This time I picked a brass/copper finish that matched our brass hardware. These sheets come in a few colors and designs.
Just figure out the size you’ll need and then it can be cut with regular scissors. This sheeting is very thin!
I used my stapler to secure the metal to the back of the cabinet frame:
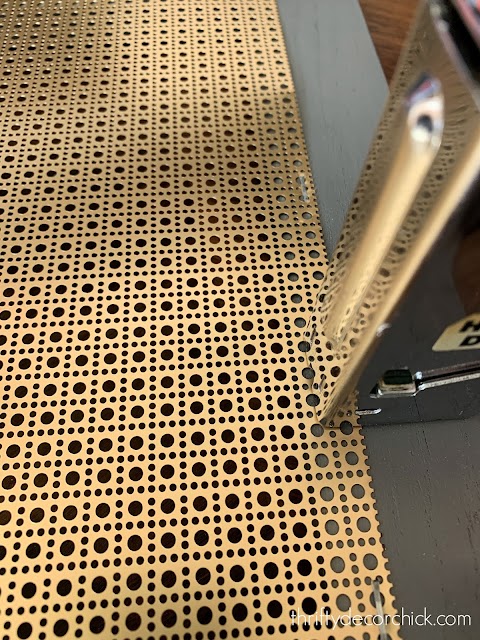
It went into the sheeting easily — but you may have to pound the staples in so they’re flush with the wood.
The rough edges of the sheeting aren’t crazy sharp — I wouldn’t rub my fingers along them on purpose but they won’t cut you just by touching it. You can add some small trim over the edges if you are worried about those.
It looked even better than I expected! LOVE it:
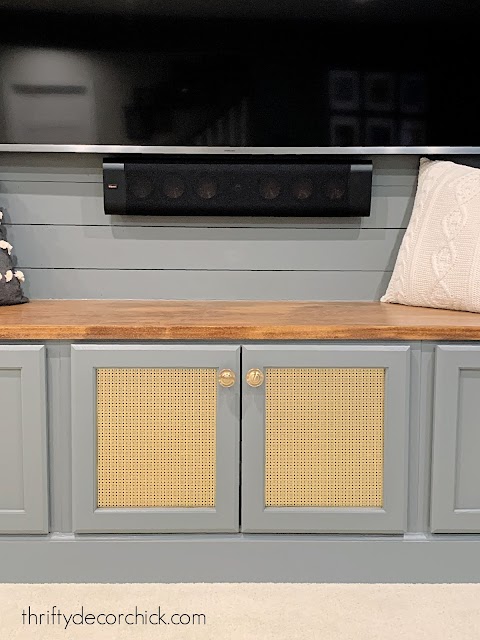
You can find links to the brass hardware I used here. I really like the design on these metal sheets — it’s called Lincane.
I know I say this all the time, but don’t let anyone tell you you can have both form and function. It just takes some creativity (or an internet search!) to make it happen. 🙂
The remote works perfectly through the sheeting — so no need to open the doors anymore:
I’m considering adding it to all three lower cabinets, but I don’t really want to spend more money when I like it as it is! This stuff isn’t crazy expensive, but I can only get one door out of each sheet. You can find these at most hardware stores or I’ll share some online sources below.
These sheets are a great option if you need remote control access in a built in unit, but they also just look great as a custom accent on any cabinet!
You can also use glass or cane if you’d rather not use the metal. Here are a few options!:
This metal mesh would give you a modern look
Use this roll of rattan cane for a traditional or transitional look
“Chainlink” metal design in copper
“Lincane” metal design like ours
Cloverleaf metal design
Hide your devices out of sight with this RF remote control extender kit
See more of our home here. To shop items in our home, click here! Never miss a post by signing up to get posts via email.
[ad_2]
Source link
You may also like
-
What security doors and windows protect us from a fire?
-
Homemade Crock Pot applesauce recipe | Thrifty Decor Chick
-
How to decorate the Everett foyer table | Thrifty Decor Chick
-
How to clean filthy window tracks and sills | Thrifty Decor Chick
-
Rattan or wicker basket pendant lights {DIY or buy} | Thrifty Decor Chick